I haven’t had any time to test aerodynamic modifications
over the past several weeks because I’ve been busy dealing with other
maintenance issues—completely new brakes on the truck (if you’ve never seen
inside a 30-year-old drum with all its original hardware and shoes, hoo boy)
and bad wheel bearings on the Prius. But I have had time while I worked
to think about lessons from these other aspects of vehicle engineering that
might apply to how we think about the process of aerodynamic modification.
If You Want It Done Right, Do It Yourself
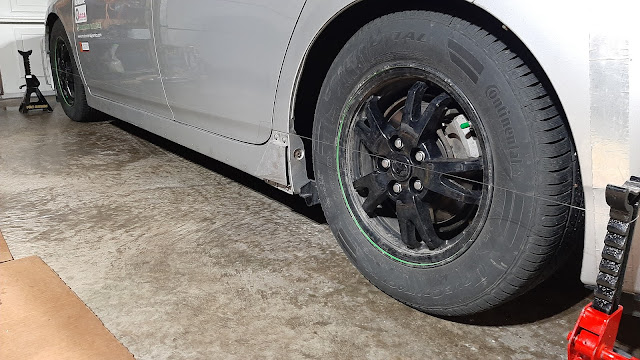
I last had my Prius aligned several years ago. At the time,
the tech said they had to shim one rear wheel to get it in spec and I thought
nothing of it. Fast forward to last week, when I had to replace that wheel
bearing: the shims (two stacked on top of each other) were spacing it out from
the axle, and as a result the bearing wasn’t even seated in the housing—it fell
off in my hand when I removed the four retaining bolts.
I put the new bearing in correctly, with no shims (and
subsequent measurement—see below—showed that this wheel didn’t need to be
shimmed in the first place. It was well within spec). A quick internet search
found the Toyota factory service manual directions for alignment which
contained the allowable specifications for rear camber and toe and the
direction not to use shims. I was pretty irate that this shop—a national
chain—had apparently ignored manufacturer instructions like it was no big
deal. I’ve had problems with this shop before, minor things like grossly
overtightened lug nuts (I had to use a 3-foot breaker bar to get the lug nuts
off one time, after bringing the car to them for a flat repair).
No more, I decided. I used to align my own cars, and now I’m
going back to doing that. When you don’t do the work yourself, you have no
guarantee that it was done to the manufacturer’s specifications and done
correctly.
I had to replace a front bearing that had gone out too, and
the car was wandering a bit on the freeway and needed a few degrees of steering
angle to keep straight. So, I broke out my wrenches for a garage alignment.
The first lesson is this: If you want it done right, you
have to do it yourself.
You Must Measure If You Want Good Results
Continuing the example of my at-home alignment, there are
two ways I could have approached this. The first way will sound crazy
(because it is): I could have eyeballed the front wheels and tried to decide if
they have too much toe-out or toe-in just by looking at them, adjusted the tie
rod ends accordingly, and taken it out for a test drive hoping both that I
diagnosed the alignment correctly and adjusted it correctly.
I don’t think any of you reading would ever do this. Why? Because
we recognize that in order to align a car properly we must measure
parameters like camber and toe first to diagnose any problem and calculate how
much adjustment needs to be done. Trying to do it by eye or by guessing is
incredibly inefficient and, if it is even possible to achieve good results this
way, will take an absurdly long time.
The second way you are probably familiar with: I tied
fishing line to a couple of jackstands, ran it taut along the side of the car,
measured the distance from each wheel hub* and corrected the placement of the
stands until the line ran exactly parallel to the car’s centerline, then
measured the distance from the front and back of each wheel to the line,
allowing me to calculate the toe and exactly how much it needed to be
corrected. I adjusted the tie rod ends a couple of times until the toe measured
correctly on both sides. Boom. Done.
 |
| This is a simple and easy way to get a better alignment than you'll get from most shops, especially if you use the steering angle sensor to center the steering wheel at its actual zero point like I did. Plus, you can customize your alignment setup to your taste. Toyota's specs say front toe should be 0-4 mm toe-in, but I adjusted to slight toe-out for better turn-in. |
The second lesson is this: You must measure if you want good
results.
[*If your car has different front and rear tracks, make sure
you account for it. This Prius has front track = 1515 mm and rear track = 1510
mm, so the measurement to the line at the front wheel must read 2.5 mm less
than at the rear to run parallel to the car’s centerline].
Application
Do these two lessons apply to car aerodynamic modification?
Yes! That’s why I’m writing this post now.
1) If you want it done right, you have to do it yourself.
You will find no end of pronouncements and advice on
aerodynamic modification all over the internet, and the vast majority of it
misses one crucial—perhaps the fundamental—aspect of airflow
modification on an existing car: because air flows differently over objects of
different shape, the effect of modifications doesn’t translate directly from
one car to another. What does this mean? Just because Car A had reduced drag
when its ride height was lowered an inch doesn’t mean Car B will too. Just
because Car X had increased base pressure when a 100 mm box cavity was fixed to
its back doesn’t mean Car Y will too. Just because Car M had less drag with a
certain spoiler fitted doesn’t mean Car N will too.
You have to measure these things on your own car. Only then,
when you know the effect of modifications and their optimum size and design on your car, can you implement them
in such a way that achieves your goals. To do it effectively, you have to test for
yourself; you can’t rely on other people’s numbers, on other cars—even from
multi-million-dollar wind tunnels—because they don’t necessarily apply to
your car. If you want it done right, you have to do it yourself.
2) You must measure if you want good results.
The analogy of trying to eyeball alignment specs applies
doubly to aerodynamic modifications. A lot of people think they can intuit or
even “see” airflows (without tuft testing); they can’t. It would be nice if such a thing were
possible; unfortunately, it’s as futile as trying to ascertain if your car has
too much toe-in just by looking at the front wheels and, just like that
fallacy, it won’t ever be possible because of the complex nature of
aerodynamics. Without testing, you will be trying to shoot an apple off a
person’s head while blindfolded, a process with high likelihood of a bad
outcome for all involved. You must measure if you want good results.
Outcome
Now, I have a properly-aligned car with correctly-installed
wheel bearings and a truck with excellent brakes that should last a long time.
The good outcome here was only possible because I did the work myself (saving a
boatload of money at the same time, incidentally) and used careful measurement
to ensure everything was done correctly. Now I can get back to testing
aerodynamic modifications and find out what works on my cars and what doesn’t,
applying these same lessons to achieve my desired outcome. You can too!


Comments
Post a Comment