For a lot of people interested in modifying their car’s aerodynamics, drag reduction is the primary goal (perhaps more so now that gas prices have shot up).
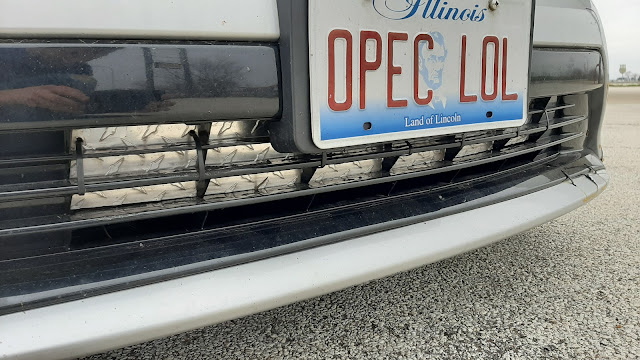 |
| In a bit of good news, my license plate is relevant again. |
Drag is any force that resists the car’s motion along its
longitudinal axis i.e. an imaginary line that runs from back to front along the
centerline. Mechanical drag is, as its name suggests, produced by the inertia of and friction between the various mechanical components of the car and/or the
road. Aerodynamic drag is the resistance generated by air as it flows
over, under, and around your car.
Because of this focus on aerodynamic drag reduction, measuring
changes in drag becomes an important task—perhaps THE most important in any
home modifier’s development program. Fortunately,
you don’t need access to a wind tunnel or a supercomputer running CFD
simulations to measure drag. There are some simple test methods you can use on
the road to measure the drag changes which result from modifications.
Caveats
First, we’ll need to temper our expectations. Don’t
think you’re going to be able to conduct some on-road testing and then
calculate a drag coefficient to four decimal places. That sort of sensitivity
depends on extremely accurate measurements—of both the forces acting on the car
and parameters such as its frontal area—that aren’t realistic for us at home (in
fact, this is actually outside the sensitivity of even the most advanced wind
tunnels, which can reliably calculate CD only to about +/- 0.001). Some
aerodynamic parameters, such as the rate of change of yawing moment, are
practically impossible to measure outside of a wind tunnel, so you should
restrict yourself to things that are actually measurable like drag and lift. Finally,
because of the natural variability of testing on the road, there will be some
scatter in results. Be as consistent as possible and you can minimize those errors
but realize you won’t be able to directly measure small changes in drag e.g. from
cracking the windows or removing the antenna. So, when you test go big—try a
tall spoiler rather than a short one, or a deep air dam rather than a small
one. Larger changes will likely show up in test results where small ones may
not.
Test Techniques
Now let’s look at some specific techniques:
constant-throttle testing, constant-speed testing, and coast down testing.
There are benefits and drawbacks to each.
Constant-Throttle Testing
This technique was developed by Julian Edgar, former editor
of Autospeed and author of Modifying the
Aerodynamics of Your Road Car and Car Aerodynamic Testing for Road and
Track. I highly recommend both books.
Basically, this technique limits engine power so that your
car has a “new” top speed, which is determined by the drag force acting against
it. Place a “stop” (a wood block, metal bracket, or similar—you can go as basic
or fancy as you want) under the throttle pedal or on the throttle body to limit
its travel so that your car tops out at a sane speed, say 60 or 65 mph. Make a
change to the body/aerodynamics and test it again, with the throttle stop still
in place. If the speed goes up, drag has been reduced. If it goes down, drag
has increased. And the percentage change in drag is proportional to the ratio
of the squared speeds, i.e.
For example, say you get a base speed of
109 kph, make a change, and get a new speed of 112 kph. Your change in drag is
or a 5.58% reduction in drag (I’ll cover significant
figures and how to use them in a future post; for now, just know that your
percentage can only have as many numbers in it as your smallest speed
measurement).
Benefits: This is perhaps the easiest and most
repeatable method for measuring drag changes. Because you’re fixing the throttle
position, there’s less chance for error than, say, trying to maintain a constant
speed. You will need some sort of throttle position display, whether on a monitor
connected to your car’s OBD port or hard-wired in to ensure
that throttle position is constant, but other than that there’s not much to it.
Drawbacks: Because this test involves a change in
speed, there is some error associated with it. Mechanical drag can change with
speed and engine torque output may vary as well. But the changes in these should
be very small, likely much smaller than the change in drag you’re trying to
measure (another reason to go big).
The other drawback has to do with your car: this doesn’t
work on cars with electronically-controlled throttles (where the computer can
vary the throttle opening regardless of throttle pedal position), or on hybrids
which can add torque from an electric motor based on what speed the ECU
predicts the driver wants. So, if you have one of these cars (like my Prius,
unfortunately—it’s a hybrid with ECT), this probably won’t work. However, some
drivers of EVs have reported successfully using the throttle-stop method to measure
changes in drag.
Constant-Speed Testing
Alternatively, we can keep the speed constant and measure
something that tells us how much power the engine is making to see if that goes
up or down. Possibilities include measuring MAF sensor voltage, throttle position sensor voltage/TPS readout from the car’s
computer via the OBD port, or possibly even engine load or calculated
horsepower from a computer such as a Scangauge.
Since this involves keeping to a set speed, it will probably
be easier with cruise control—but be careful because even cruise control
systems can allow some variation in speed. On a flat stretch of road, drive at
a constant speed and note the MAF sensor voltage, throttle position, load, or
horsepower. Then make a change and drive the same road again at exactly the
same speed. If the parameter decreased, drag has gone down; if it went up,
drag has increased.
Benefits: The main benefit of this technique as
opposed to constant-throttle testing is the removal of the change in speed,
which means that mechanical drag and engine RPM are now constant (assuming you
have a transmission with fixed gear ratios, not a CVT).
Drawbacks: There are a few drawbacks, however. No
matter how conscientious you are about it, there’s always the possibility that
speed will vary slightly over the test. This method also depends on the
sensitivity of your MAF sensor or TPS, so small changes in drag may not show
up. The problems with electronically-controlled throttles and hybrid systems apply
here too. And crucially, even if you have a combustion-engine car with fixed
gear ratios and a mechanical throttle connection you won’t be able to easily
calculate the percentage change in drag like you can with constant-throttle
testing.
Coast Down Testing
Finally, coast down testing is one of the oldest (and most
problematic) methods for measuring drag changes.
Most people are familiar with this one: accelerate your car
to a certain speed, then put the transmission in neutral and let it coast,
measuring the speed at regular time intervals. Graph the speed as a function of
time and you should get a decreasing parabolic curve.
Benefits: The most obvious benefit of this method is
the removal of engine power as a variable. Without that, you’re really just looking
at an acceleration determined by the force (combined mechanical and aerodynamic
drag) acting against the car’s motion. To ensure that aerodynamic drag
predominates, you have to test at very high speeds; too low and aerodynamic
drag has little influence on the car’s deceleration.
Drawbacks: In reality, this method doesn’t yield
consistent results on the road; a single errant gust of wind can screw up your
results for an entire run. I’ve tried it on three different occasions—taking care
to minimize error as much as possible by testing in the middle of the night
with no traffic and low wind, on the same stretch of flat road—and never
got reliable data. If you can get it to work, more power to you. But I see
little reason to attempt it again when methods like throttle-stop testing are
easy to do, more reliable, and take far less time.
Check
No matter which method you decide to try, it’s a good idea
to check it against a known change in drag. The easiest is to simply roll down
all the windows, which usually increases drag by a few percent. Run windows up
against windows down and that change should show up in your results. If it
doesn’t, ensure you’re minimizing potential sources of error and try it again,
or use a different method.
I should also note that there are other ways to quantify
changes in drag, from measuring fuel economy to using sensors that attach to a
driveshaft and measure torque directly (this method was used by Ford as early
as the 1960s!). However, the former is subject to wild inaccuracy and the latter is very expensive. Still, the sky is the limit—use
your imagination, and you might be able to come up with another way of
measuring drag.


Comments
Post a Comment